Pages

Wednesday, November 19, 2014

You name it, we’ve cut it!


When you gather with family and friends this thanksgiving season, no doubt you will know each of their names. The question is, will your guests know their place? 


Make seasonal name cards for each guest’s place setting so they not only know who they belong to, but where they belong. This can be easily done with the Wee Gather Together Leaf Labels graphic set on Lettering Delights. Simply print out the labels, (I used sticky-back label stock), use your best penmanship, attach each to a colored card stock folded in a tent stand, and put each person’s card at the table.


If you want to add a bit of faux nature to the great indoors, add a few autumn leaves, seeds, and pods to each place setting. Also, give each guest their own thanksgiving message on a handcrafted trivet. The files can be found here: Wee Gather Together Trivets. They will thank you, and be thankful for you.


If you are looking for a way to invite your guests, while keeping in the thanksgiving spirit, just print out any of the Wee Gather Together Cards. You can even make envelope liners with the paper designs, also available at LD. See the photos below for the complete set of cards.


Enjoy the holiday with your family and friends and don’t forget to count your blessings!

Saturday, November 15, 2014

Petite decor for grand appeal


If you liked it, then you should have put a ring on it. Well, that’s what I did for this tiniest of decor for the harvest season. I have a candle stick with six cups that hold thin, tapered candles. While it is a pretty candle stick, it needed something to make it really something. I created just the thing to give it that grand appeal. I put some rings on it.


These petite rings are made from the Wee Gather Together Leaf Rings cut it set on Lettering Delights. Each tiny ring of leaves (the green base) is about 1 to 1 1/4 inches across. Each tiny flower is about 1/2 inch across. You will need seven tiny flowers per base if you choose this flower pattern, but there are many leaf options to choose as well. You can see other craft ideas in my posts with the leaf rings.


I used text weight papers from Paper Source and each ring and flower cut out smoothly. Once I had six rings and seven flowers per ring I started putting them together. I carefully pinched the petals of the tiny flowers toward their centers to cup them. I then put dabs of white glue in the centers of each leaf section on the ring and attached the flowers. It was sweet and simple and that is it!


To make the larger ring of flowers in the center of the candle holder, I cut out a circle of gray card stock to make the center base for the ring to sit on. I then repeated the same task as above, but this time I also made the tiny flowers for the center, then three additional sets of flowers in larger sizes (about 1 1/2 inch across) in paper colors: curry, tangerine and papaya. The green leaf base is in the moss color. I curled the tangerine and papaya flowers upward and the curry slightly downward. I then attached each flower to the base with tiny brads through the holes in the centers of all four flowers and leaf base. These would also make wonderful lily pad flower decor for a summer season.

To see the project of the ring of flowers around the letters (in the photo above) please see the previous post. Also, imagine the larger ring of flowers encompassing a pillar candle for even more grand appeal. Bigger isn’t always better, but it might be easier to work with. :)

May this thanksgiving season be filled with joy, and surround your ring of family and friends.

Friday, November 14, 2014

Ring of fire


Now is the time to begin creating decor on your doors, walls, and tables for Thanksgiving day. Think about surrounding your various candles with autumn flames: leaves and flowers. Also use these rings of fire for garland signs and swags.


These leaf and floral rings are made from the Wee Gather Together Leaf Rings and the Wee Gather Together Alphabet cut it set on Lettering Delights. The hanging larger leaves below is from the Wee Gather Together Leaves set and the chipmunk is from the Wee Gather Together Harvest graphics set.


The task is simple, but the work might keep you busy right up until the family and friends arrive for the day. Use the leaf and flower ring cut-it files to make each of these ring-around-the-seasons.


To make the garland ring of “Give Thanks” which surrounds the candle holder (in the photo at top), I used the thinner flower ring shape. I cut seven flowers from papaya colored paper, per ring, as well as the ring itself in chartreuse, and tiny centers from white paper (you could hole punch those). I simply curled the petals up for the flower’s center and glued each to the ring base in position. I also curled the green petals upward as well. Once I had each ring of flowers made I cut out the letters from the Wee Gather Together Alphabet cut it files to read: give thanks. I made the base in dark brown and the top stencil circled letter in tan. Each of the rings and stencil circle letters is about three inches across. See the photo above.


To make the “HARVEST” vertical hanging garland I did the same task as above, but cut out two addition leaves per spot to make a full wreath of leaves. The oak leaf ring has nine leaves within the ring, so I added two additional leaves in the same size of yellow (curry) and red (papaya) to place between each orange (tangerine) oak leaf—on the ring. See the photo below to see the steps. I did curl each leaf inward with a bamboo skewer.


I also made the letters with the two part stencil (base and letter) and glued the oak leaf wreaths to each of those letters and hung the HARVEST garland on the door with a piece of vintage seam binding.


If you would like this look, you can achieve it with fewer leaves cut out and still have a lovely wreath garland look. The photo below shows the rings with only the original orange ring (R) and letter, additional red leaves (A), or with all three colors, adding yellow leaves (H).


There are many ring leaf patterns to choose from, and if you like you can mix and match. See a few additional samples below.


Now, share these crafts ideas with your close ring of friends!

Thursday, November 13, 2014

We gather leaves together


Create a harvest wreath for Thanksgiving day. Make a garland swag of autumn leaves. Display signs of autumn and bring the warmth of color to the chilly winds of autumn.

If you want to have beautiful autumn leaves last all season, get the leaf collection on LD and save them like you would the leaves in nature. This is a simple craft that can be used in many projects over the harvest season. To do so you will need, the files to make these creations from the Wee Gather Together Leaves cut it set and the Wee Gather Together Sayings on LD.


To make the autumn leaves, I chose papers from Paper Source in text weight. After I cut out various leaf sizes and shapes, I bent and curled them into shapes to resemble actual leaves. I then sprits sprayed them with a few spray paint colors for added texture and let dry.


I got a grapevine wreath and laid out the colored leaves, then tucked in a few pods and seeds from the Wee Gather Together Seed and Pods collection. 


I then created a sign from the Wee Gather Together Sayings also on LD to display in the middle of the wreath. These sayings can be used for other harvest and holiday decor purposes as well.


The autumn leaves can decorate a wreath, but they are also festive and fitting to hang in garland strands both inside and outside of the home, school, or workplace.


Don’t let this season come to a close without taking in the beautiful colors that will soon fade into winter days of gray.

Wednesday, November 5, 2014

Lotus make pods together!


One of my all time favorite nature nuggets growing up was the dried lotus seed pod. It seemed to be everywhere in the 1970s bringing nature into every home in America long enough to collect a lot of dust in those little holes. I loved the seeds rattling around in the pod and would try to take them out to no avail.

Well, since I could not get those seeds out I decided to create my own paper lotus pods without seeds, so there will be no seed removal frustration to tend with.

I also loved star anise seed pods, and could in fact remove those seeds. However, my favorite part about star anise was the shape and the smell. In paper crafting I am able to recreate the look of star anise, but the smell will have to be left to the viewer’s imagination.


In this post I will show you how to make the lotus pod and star anise. To do so you, the file you will need to make these creations is the Wee Gather Together Seeds and Pods cut it set on LD. The chart below shows the items (cut it files) that are in the set. Then in photos further down you will find the charts of those pieces turned into three dimensional art.


To make the lotus pod you will first need to cut out the top and base of the pod pieces. The top has many holes, the base looks like an 8-petalled, round flower. Use text weight paper (I use Paper Source text weight) to get a nice bend to the paper without tearing.


Once the pieces are cut out, take the 8-petal flower shape and attach each petal to the one next to it, overlapping slightly at the ends (about .125 inch) using tacky or white glue and mini clothes pins to hold and dry until you complete the base. You should end up with a cup or cone shaped piece. See the “how to” chart above. 

After the base is completely dry, gently crease each petal end to form a flattened tip of each petal all the way around the base. This will be small, but enough of a flat surface to then glue the top of the lotus pod (the circle with the holes in it) to its base. I suggest laying the top on the table surface, gluing around the edge of that piece, then placing the cone shape, as if it’s a mound, onto the other piece and securing with mini pins all the way around the pod until it is dry (see photo above). Finish off with a piece of florist wire or a painted bamboo skewer, and add leaves on the stem if you like.

I chose to spray paint the lotus pods once complete in a sprits fashion to give extra color and texture to the pod pieces. This can be done before or after the pod is assembled, but it is probably best done after. 


To make the star anise you will first need to have lentils or some other small seed-like pieces for the seeds of the star anise. You will need eight lentils per star anise. I chose to gloss the lentils with clear nail polish to make the seeds glisten, as the seeds actually do in real star anise. 

Cut out the flower shaped piece (shown below) in a paper weight that is not too thick (again, I like to use Paper Source or equivalent text weight). Next, crease each petal combo, first where they meet, then crease where they are adjacent to the next, going around the circle. See the “how to” chart below for steps.


Once the shape has been creased everywhere, you can begin to form the flower (star) shape. You will make eight petal pieces by dabbing a bit of glue on the tips and clothes pinning them together until dry. When all eight petals are dry, push the star shape inward toward the center, then glue and pin the center area, holding until dry and star shape is complete. This will take a little effort and quite some time to dry. (see photo above) If you have trouble with this step, you can use the small piece that was cut out of the center of the flower shape (hopefully not thrown away) and use it, gluing it under the center of the star, holding it together.

Since you have only glued the tips together on each petal, you will be able to form the petals into canoe shapes which will then hold a lentil (seed) in each petal. Dab glue in each crevasse and add a lentil, sitting vertically in the space. If you would like to add color and texture to the star anise, you can spray paint it when complete (as I have) but make sure you spray paint before you add the lentils.


Use these lovely accent pieces for autumn wreath and swag garland, or for table decor during your holiday season. Maybe even decorate a table where you will be serving mulling spiced cider and hot drinks. Then you will have that wonderful smell that accompanies your beautifully made star anise. Enjoy!

Monday, November 3, 2014

It’s so nice to fool mother nature


Growing up, I loved the bits of nature that I could collect, or at least enjoy experimenting on in their natural habitat. I always loved seeing the soft, white fluffs floating into the sky from a milkweed pod when I would gently pull the woody shell apart. It was a bit like blowing dandelion fluffs into the air, but somehow more rewarding and enjoyable. I think because the seeded fluffs were so perfectly encased in the pod, so silky and fun to play with, that milkweed pods were this fluffer-nutter’s joy of nature. Real nature, that is, the kind you really can’t fool.


I guess my love for nature nuggets combined with the challenge of trompe l’oeil, in paper crafting, has brought me to the joy of seed and pod re-creation. I thought it would be fun to share it with you as we try to create a little art to fool mother nature and last even longer. 


In this post I’m going to show you how to make the milkweed, chinese, and flaming lantern pods. The file you will need to make these creations is the Wee Gather Together Seeds and Pods cut it set on LD. The chart above shows the items (cut it files) that are in the set. The photos below show charts of those pieces turned into three dimensional art.


To make the milkweed pod you will need the tri-petal piece and the seeds shown above. Cut them out, choosing gray paper for the pod shell and seeds. I used a gray paper from Paper Source, in a text weight, for this pod.

After the pieces are cut out, take the tri-petal piece, fold each inward to the center to crease each, then curl and bend the three petal pieces. I curled two inward and one into an ‘S’ curve for the open piece.

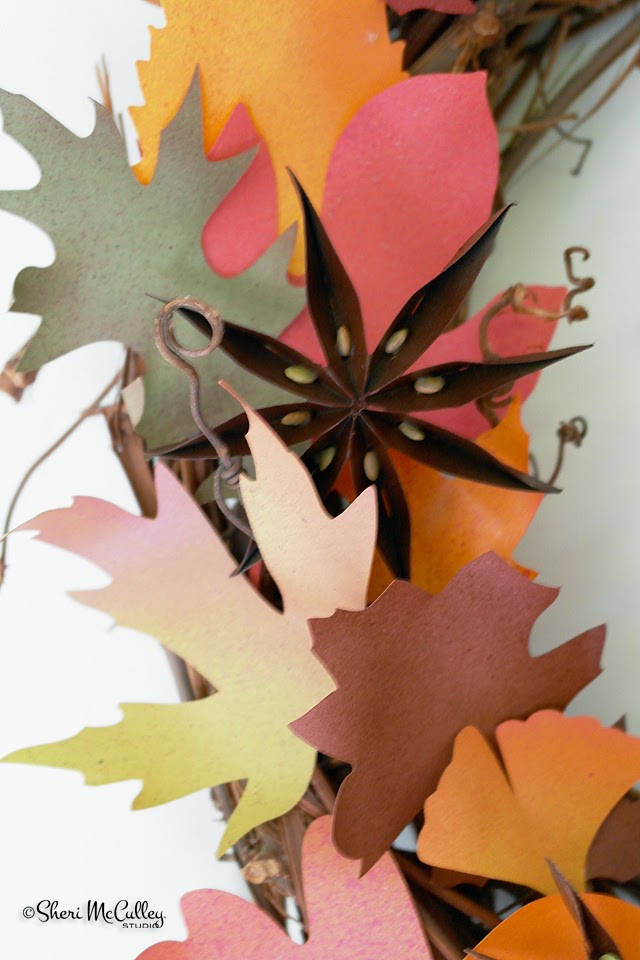
Next, using tacky or white glue, attach the two curled-in petals together to create a cocoon shape and hold in place with a mini clothes pin until dry. See photo “how to” sample above.


Use an 8-10 inch piece of florist wire for the stem, and at one end, glue the seed pieces (that you will fold in half) to the wire with a small downy feather, or bit of fluff, also glued between the seed parts to the wire. Do this with at least 5-7 seeds (though there are many), altering the angle back and forth on the wire within a two inch space, ending with a seed and feather at the end of the wire. Now, thread the wire down into the pod shell so that it incases the seeds/fluffs. Finish off the milkweed pod with a couple of green leaves along the stem.


To make the chinese lantern pods first cut out the 5-petal star shaped piece, as shown in the image below. I used a paper from French Paper Company that I have had for years, but I recommend any colors you like from Paper Source, in a text weight, for this pod.


After the star shaped piece is cut out, take the petal pieces, fold each inward to the center to crease each, then curl and bend the five petal pieces. I curled first outward, then at the tips inward to create a teardrop shape when complete. Next, using tacky or white glue, attach the curled-in petals together to form the teardrop shape and hold in place with mini clothes pin until dry. I glued only the pieces together closer to the tips, but not completely to the ends. I also did not glue the petals together where they meet at the center so as to have more play and bend in the paper petals parts. If you do this you will have slit openings where each petal meets to for the teardrop shape. See the photo “how to” samples above and below. The photo above shows the beginning steps and the photo below shows the ending steps.


After I had the teardrop shaped lantern pod completed, I chose to sprits spray paint the pod to add visual texture. Once dry, I slid the pod up a piece of florist wire (with the end of the wire curled, as shown in the photo), then bent the wire into a rod or cane shape allowing the lantern to dangle down over the wire. See the photo above to help explain this process. Finish off the chinese lantern pod with a couple of green leaves along the stem if you like.


To make the flaming lantern pod, you will need the tri-petal piece and the seeds shown below. Cut them out, choosing tan or a warm color of paper for the pod shell and brown for the seeds. I used the tan paper for all, then colored the seeds with a brown marker.

After the pieces are cut out, take the tri-petal piece, fold each inward to the center to crease each as well as crease each petal down its middle and squeeze together, as shown in the photo below. I chose to sprits the piece at that time with spray paint to give added visual color and texture.


Next, using tacky or white glue, attach the petals together only near the tops and hold in place with mini clothes pins to dry. Once the pod has taken shape, curl the ends of each petal outward a bit.

To complete the flaming lantern pod, use a piece of florist wire, thread down through the lantern and glue one of the seeds onto the end of the wire with the wire being sandwiched between the folded seed piece. Next, glue a seed about .75 to one inch up the wire (sandwiching the wire) to have a place for the lantern to dangle without falling to the end of the wire. Now, bend the remaining wire into a rod or cane shape, and add a few leaves onto the stem. See the photo “how to” above.


When you have your milkweed and lantern pods complete you can use them in wreath or hanging swag decor, put them in a vase, or attach a ribbon name tag to each and have one for each guest at their place setting as table decor for Thanksgiving dinner.

Wednesday, October 29, 2014

Going nuts for autumn crafts


I love nature nuggets and collect them throughout the year. I also love to create art with paper and have designed a variety of nature nuggets of my own for this fall season. If you would like to create some of your own join me on my blog as I will be sharing how to tips for the next few weeks for each of the seeds and pods I have created on Lettering Delights.


The file you will need to make these creations is the Wee Gather Together Seeds and Pods cut it set on LD. The chart above shows the items (cut it files) that are in the set. The photo below shows a chart of those pieces turned into three dimensional art.


In this blog post I will be sharing information on how to make the walnuts and the cinnamon sticks.


To make the walnut halves you will need the three pieces shown below. Cut them out, choosing darker brown paper for the shell parts and tan for the nut. I did not have a brown color of paper in the weight I like to work in, so I used a tan paper from Paper Source, in a text weight, and then darkened it with a brown marker before assembling the pieces.

Make the shell by curling the piece into a bowl shape, then fold the parts where they meet in the center area to pull the edges inward. Next, use a bit of glue (I use tacky glue) for each end, overlapping the outsides to the center part slightly, and secure with a small clothes pin until dry. Do this on both ends to form the shell (it will look like a bowl). You may need to trim a bit of the tips that are slightly higher on the ends where the pieces are glued together to have a flat edge on top of the bowl shaped piece before you glue it to the nut piece. The more level the edge of the shell (bowl shape) is, the better it will stick when gluing to the other piece.

For the nut part, simply glue the nut over the scalloped shell piece, using just a bit of glue around the edge of the nut shape. Once it is dry you can glue the top and bottom pieces together. First, turn the nut/scalloped combo piece over on your work surface so that the back is facing you. Now, spread glue along the top of the shell (bowl shaped piece) and position it carefully over the nut to center it. Press gently but firmly until the pieces hold together. In the photo below you can see the steps and the completed walnut from the top and bottom sides of the nut. Refer to the “how to” chart below for helpful tips. 


To make the cinnamon sticks, which are very easy, you will need the file of the cinnamon stick paper. Simply cut out the paper in a color you like for cinnamon. After I cut the paper out in a reddish brown text weight paper, I spritzed it a bit with brown spray paint to add a little texture and darken the color. You can roll the paper up in a traditional roll, or roll from each end into a scroll. Since cinnamon sticks come both ways, try each. First curl the paper, then use a bamboo skewer or pencil to roll the paper as tightly as you can. If you roll it into a scroll you may want to glue the two ends together and secure with small clothes pins until dry. Refer to the “how to” chart below for helpful tips. 


I decided that creating an acorn out of paper will have to be left to the professional paper crafters, as I could not achieve that feat. However, I do have a few ideas for hand crafted acorns that you might like to try. First you will need to collect acorn caps from oak trees. Then you can make the nuts by felting balls from wool. I made mine the dry method way, but you can also use the wet felting method. I think you might even be able to buy wool balls at craft stores. Once you have the wool ball, simply glue it to the acorn cap.


I also have some crocheted balls that were from a neckless I had picked up for crafting. I simply used one of those for the nut of the acorn and glued it to the acorn cap. You can see both acorn options below.


I will share other seed and pod crafting in a few more days, so if you are still waiting for how to make that milkweed or lotus pod, come on back and I’ll share my secrets. Now, don’t go nuts making each of these nature-turned-paper nuggets, this is intended to be fun. Enjoy!