For me, there is nothing more iconic to summer nights than fireflies and hanging lanterns. When I was a kid we spent a week each summer at a campground where hanging lights were strung from tent to tent. A single light bulb hung from the middle of our tent to lighten the little home for the week, and other than the occasional flashlight streaming from the path, glowing fireflies were the only other glimmer of light in the darkness each night. But in that darkness it was magical, because heat and bugs and even humidity all vanished as the quiet moan of a fan breezed across us as we slept. Oh, to be a kid again!
Well, I’m not a fan of outdoor living like I was as a kid, not even for a week at this age. However, we do have that same style of lights hanging across our porch, and when I look out each night I have happy memories from those summer weeks living in a tent when I was a kid.
I do love the honesty of the bare bulbs on that string of lights, but I thought it might be fun to liven things up a bit and adorn them with lanterns of my own design, for at least a few nights this summer.
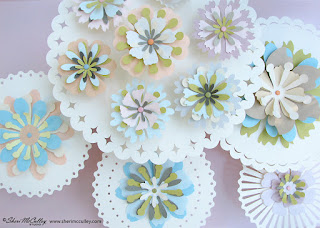
This project is so simple that it can be done before nightfall, hanging, and lighting your porch. In order to make these lanterns you will only need one of the cone shapes from the Cut Flowers Accessories set on LD (I chose the slotted cone shape to allow for maximum light to be visible). The only other thing to complete this project will be assembled and bradded flowers to attach to each lantern. I made flowers from all of the petal sets from the Cut Flowers collection on LD.
I simply cut out as many lanterns as light bulbs, in a rainbow of colors. A bit of tape secured each cone where the two ends meet and slide together.
Next, I chose various colors and shapes of petals, attached them together with a tiny brad, made a small hole in each lantern and bradded a flower to each one. I didn’t even get the glue out for this project. :)
To hang the lanterns on the lights (the bulbs are approximately 1 and 1/2 inches in diameter, this set is from Target) I folded the tabs in at the top of each lantern and gently slid them over the bulbs. The tabs work as a cover over the bulb and the lantern dangles from it.
Here is a photo, below, of an assembled lantern from above to show the tabs covering the bulbs and holding the lantern in place.
I hope you have some wonderful memories of your childhood summers and are making new ones with your own family and friends. Just incase you are looking for one more thing to create new memories this summer, think about turning this project into a new one. Who knows, this might be just the splash of color missing in your evening skies and future memories. Enjoy and happy summer!


